Once you have finished boiling your wort, it is best to reduce the temperature as quickly as possible below 25C to allow you to pitch the yeast. This reduces the chances of any nasty airborne bacteria becoming established in the nice sugary wort solution before your actual ale yeast has got to work. It is also known as the ‘Cold Break’ and helps to precipitate some extra protein resulting in a clearer beer.
There are several common methods used in home brewing to cool the wort:
- Standing the fermentation vessel in a bath of cold water
- Using an insertion chiller coil
- Using a counterflow chiller coil
The benefit of the counterflow chiller is that the wort is cooled completely by the time it has run through the coil and therefore this offers the fastest way of reducing the wort temperature.
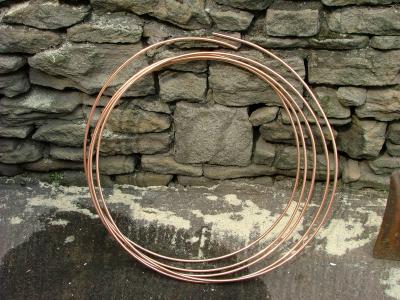
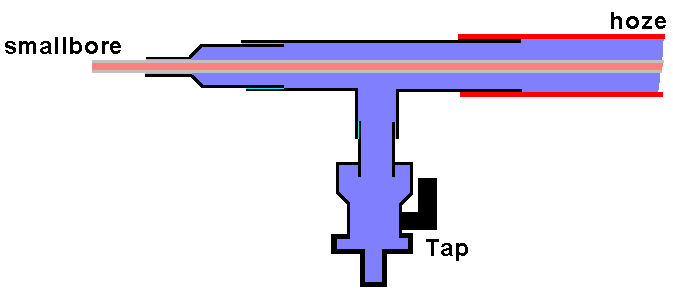
The idea for a home made version is to have a tube within a tube. The hot wort is passed through the inner tube and cold water is passed through the outer tube (surrounding the inner tube) in the opposite direction. The internal tube must be made from a heat conducting material and is therefore usually small bore copper pipe as often used in central heating systems. The outer tube is often a length of garden hose as this is cheap and flexible. Commercial versions have closely spaced plates between which the wort is passed but these are quite expensive to buy hence the reason for making one.

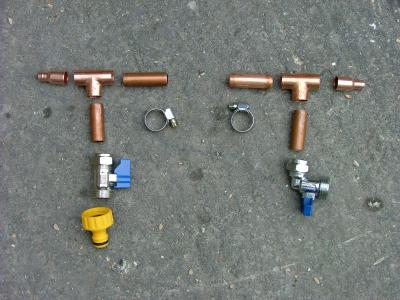
A few readily available plumbing fittings are required. Standard 15mm tube and connectors were used and two 15mm to 8mm reducing adapters. The 15mm to 8mm reducing adapters have to be drilled through with an 8mm drill as otherwise the 8mm pipe will not thread through the centre. The fittings are shown below:


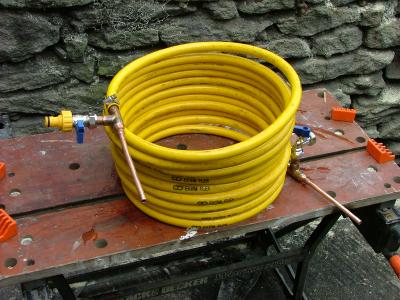
I terminated the cold water connections with washing machine/dish washer taps as this makes it easy to fit standard quick connect garden hose attachments. The assembly involved carefully straightening the copper tube and pushing through the centre of the hose pipe. The copper fittings were then threaded over the 8mm tube. Before soldering, it is important that the hose is coiled (by wrapping around a plastic container) into the final shape because the inner pipe becomes shorter during the coiling process. Once coiled, the copper fittings can be soldered in place to the inner 8mm pipe and then the hose can be pushed over the 15mm stub ends and secured with the jubilee clips.

It’s important to feed the hot wort in at the top and let gravity take over to make the wort flow slowly down through the coils and out of the bottom pipe. If the bottom pipe is suspended above the fermentation vessel, then aeration will take place as the wort drops into the vessel. It’s also important to feed the cold water in at the bottom to get maximum cooling of the wort as it leaves the bottom pipe.
You can adjust the flow of cold water until the wort is leaving the bottom tube at the desired temperature which can be monitored with a thermometer during use.
For anyone not confident with soldering, like me, compression fittings work just as well. I used compression Ts for my cfc, built as above. A short length of 15mm pipe on the unattached ends of each T allows you to fit a compression 15 to 8mm adaptor (drilled out). You can also dispense with the washing machine taps – just remove the compression nut from the right angle thread, and the hose fittings screw directly onto it.
What length of pipe did you use?